Using bonds correctly: Professional instructions for perfect hair extensions 2025

What are bonding extensions?
Bonding extensions are strands of human hair that are attached to your own hair using keratin bonding. This hair extension method is considered to be particularly long-lasting and gentle if the bondings are used correctly.
The most important advantages of bonding extensions:
- Natural look: Invisible joints
- Long stop3 to 6 months with proper care
- VersatilitySuitable for all hair types
- Real hair qualityStyling options like your own hair
- Gentle method: No gluing or sewing required
Preparation: The nuts and bolts of bonding
Before you start the Insert bondings thorough preparation is crucial for the result.
Step 1: Carry out hair analysis
Check the hair structure and health:
- Your own hair should be strong and healthy
- At least 1 cm long for optimum hold
- No severely damaged or brittle areas
Step 2: Professional deep cleaning
Important: Wash the hair before insertion with a Deep cleansing shampoo.
Avoid at all costs:
- Conditioners or rinses
- Leave-in products
- Oils or serums
- Silicones
Step 3: Prepare the required materials
Professional equipment for bonding extensions:
- High-quality keratin bondings
- Professional heating tongs (180-220°C)
- Heat protection stencil
- Handle comb for precise dividing
- Compartment clamps
- Extension brush
Step-by-step: Using bondings professionally
Step 1: Part hair systematically
- Separate top hair: Fix top layers of hair with clips
- Start from the bottom: Start at the neck
- Horizontal departments: Work your way up row by row
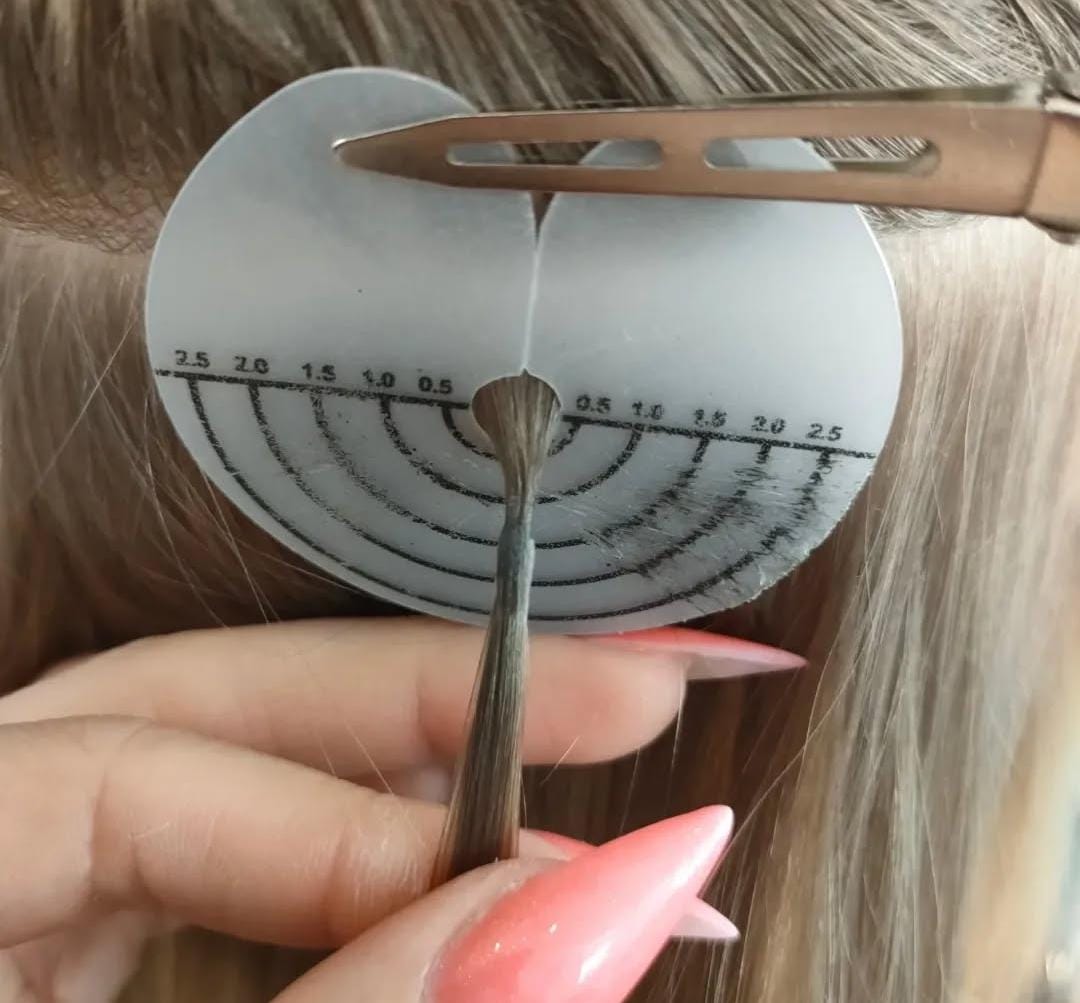
Step 2: Select your own hair strands
Optimum strand thickness:
- As thick as the bonding itself
- Even distribution for a natural result
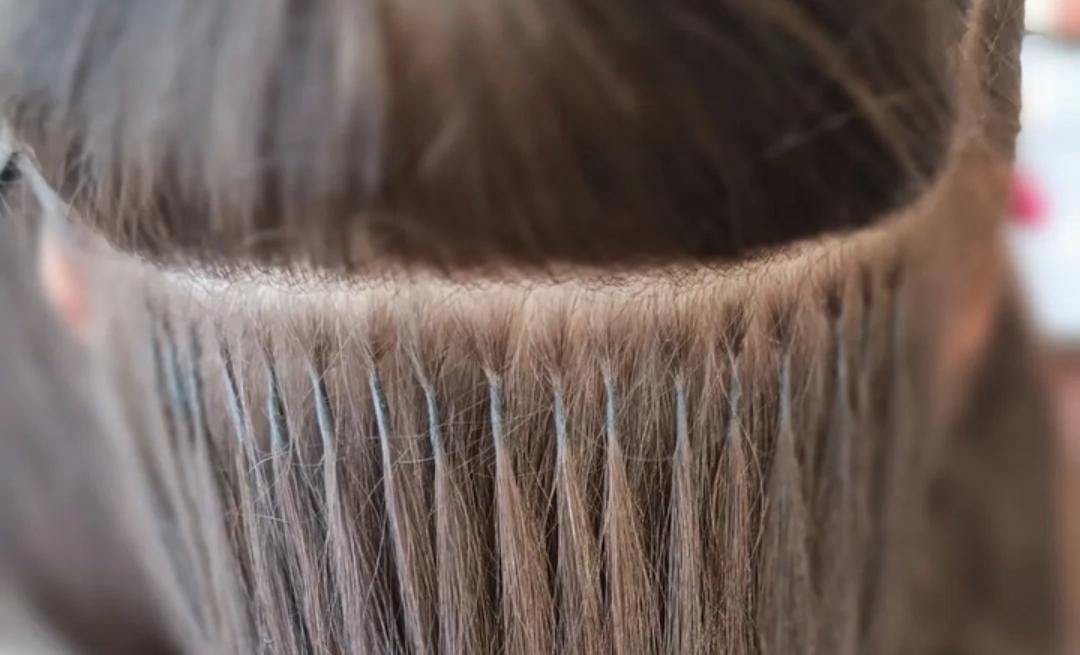
Step 3: Position bonding
Perfect positioning:
- approx. 1 cm from the scalp
- Ensure even distribution
- Not too close to the hairline
Step 4: Heat and mould the keratin
Professional technology:
- Using heat tongs
- Heat keratin evenly
- Press into a round, even shape with your fingers
Step 5: Quality control
Check every connection:
- Firm hold without slipping
- Comfortable to wear
Use care after bonding
The first 48 hours
Absolute no-gos in the first 48 hours:
- Wash hair
- Tight hairstyles
Long-term care for bonding extensions
Daily care:
- Only with Extension brush Brush
- Working from the tips to the roots
- Tie your hair up before going to sleep
Weekly intensive care:
- Use mild, sulphate-free shampoos
- Apply intensive hair treatments
- Tip fluid for suppleness
Monthly check:
- Professional follow-up check every 6-8 weeks
- Rework bondings that have grown out
- Check the overall condition of the extensions
Avoid typical bonding errors
Error #1: Too close to the scalp
ProblemTension, itching, hair breakage, hair loss Solution: Maintain a distance of at least 1 cm
Error #2: Incorrect strand thickness
ProblemUnstable hold or unnatural appearance SolutionOwn hair strand = bonding thickness
Error #3: Insufficient preparation
Problem: Poor adhesion of the bondings Solution: Thorough deep cleaning
Error #4: Unprofessional tools
Problem: Damage to the hair Solution: High-quality heat tongs with temperature control
FAQ: Bonding Extensions - Your most important questions answered {#faq}
How long do bonding extensions last?
With professional insertion and optimal care 3-6 months. The durability depends on hair growth, care and quality of the bonding.
Can I apply bonding myself?
Possible in principle, but professional application recommended. Mistakes can lead to hair damage.
How much does it cost to insert the bonding?
Prices vary depending on:
- Number of strands
- Hair quality (human hair vs. synthetic hair)
- Salon location
Removing bondings: do it yourself or go professional?
Always to a professional! Improper removal can cause severe hair damage.
Which hair types are suitable?
Suitable for:
- Healthy, strong hair
- All structures (smooth, wavy, curly)
- Minimum length 1 cm
Not suitable for:
- Very thin, brittle hair
- Scalp diseases
- Extreme hair loss
Professional tips for perfect bonding extensions
Insider tip 1: The right order
Always start in the neck area and work your way up systematically. This will ensure even distribution.
Insider tip 2: Temperature control
Optimum temperature: 180-220°C. Too hot = hair damage, too cold = poor adhesion.
Still unsure? Let us advise you!
The Haartick Extensions team is at your side with over 15 years of experience. Arrange your free consultation today and get advice from real professionals.
Make an appointment now Free consultation 15+ years of expertise